 create new ticket
 check ticket status
Our conversion with Google Analytics uses the Collections API to push 'Offline Conversion Events', more information on this can be found here:
https://developers.google.com/analytics/devguides/collection/changelog
https://developers.google.com/analytics/devguides/collection/protocol/v1/reference#endpoint
The Google Analytics integration is performed server-side and is compatible with both classic and Universal Analytics. Both Static and Dynamic numbers can be pushed to Google Analytics, we advise setting up different conversion events within Analytics for dynamic numbers and static numbers.
How it works
When we receive a dynamic call we log the analytics client ID, or when static we use a generated hash. Every 15 minutes we push an offline conversion event into Google Analytics, the parameters of the event are defined by you when setting up the integration.
All possible Analytics events are as below:
https://developers.google.com/analytics/devguides/collection/protocol/v1/parameters
Standard parameters we sync into Analytics are as follows:
Version=1
Tracking ID: (Your GA ID)
Anonymous Client ID: (Either defined or hash generated)
Hit Type: Event
Event Action: (Defined in Setup)
Campaign Source: (Dynamic or defined on number)
Campaign Medium: (Dynamic or defined on number)
Campaign Name: (Dynamic or defined on number)
Campaign Content (Dynamic or defined on number)
Event Category: (Defined in Setup)
Event Value: (Defined in Setup)
geoid: (Dynamic, country code of caller)
GCLID: (if available)
We also push numerous call parameters (duration, caller, called etc) into custom dimension fields which will be discussed later in this article.
Setup & Settings
To setup the integration, find the Google Analytics under the integration list and click on it, then click 'Use Integration'.

You will be prompted to sign-in to your Google Analytics account and authorise our third-party authentication app. Once authorised you can then proceed to the settings page. Your PropertySID and API credentials are available on the 'Home' page.
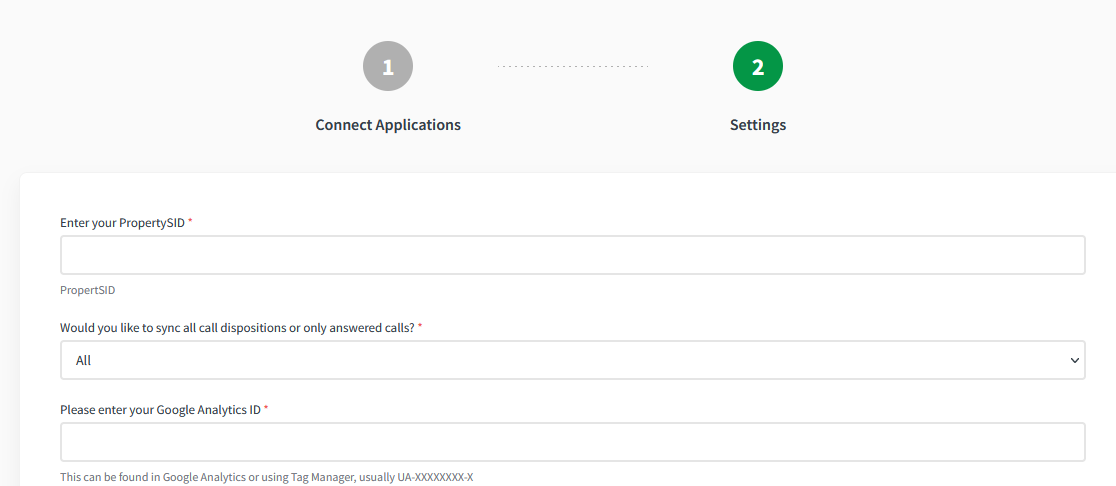
You will be required to enter the PropertySID of your account with us as well as the Google Analytics ID, the account that authorised the integration must have access to make changes to this Analytics account.

You will then need to enter a 'Goal Name', 'Category Name' and 'Event Value', these must exactly match (case sensitive) the parameters in Google Analytics.
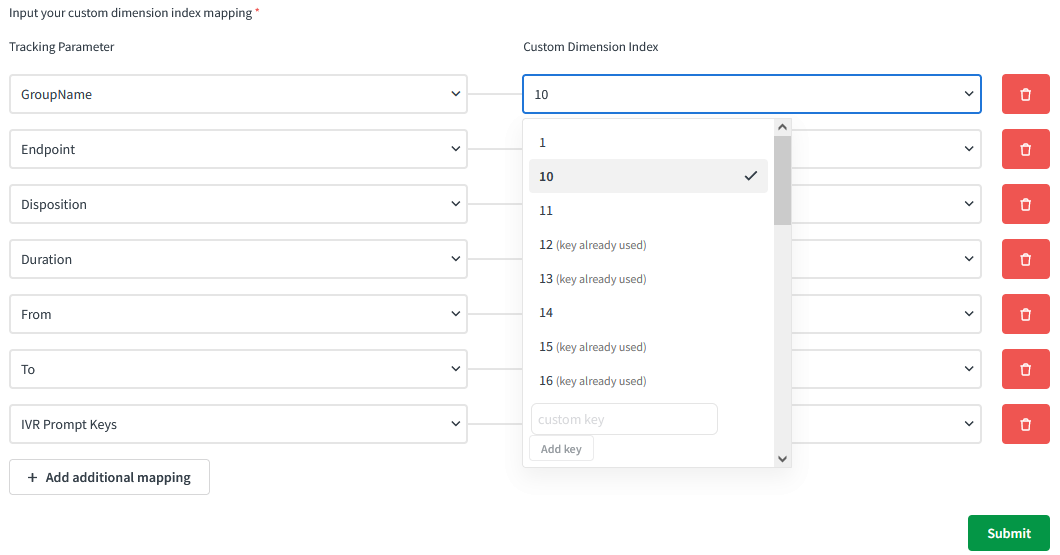
Finally you will select to include custom dimensions or not, custom dimensions include:
- GroupName
- Duration
- IVR Prompt Keys
- To
- From
- Endpoint
- Disposition

If selected, you can map each of these to any custom dimensions to the relevant index number in Google Analytics.
Once these fields and the optional custom dimensions are entered you can click submit and your integration setup will be completed from our side, you will then need to setup a goal within Analytics and optionally reporting on these goals, below is a guide on how to do this.
Recommended Configuration
It is recommended that at least one goal is configured in Google Analytics. The goal should be an event based goal filtering on the Event Category and Event Action as described above.
Step 1
Log into your Google Analytics account and click Admin at the bottom left hand side of the page.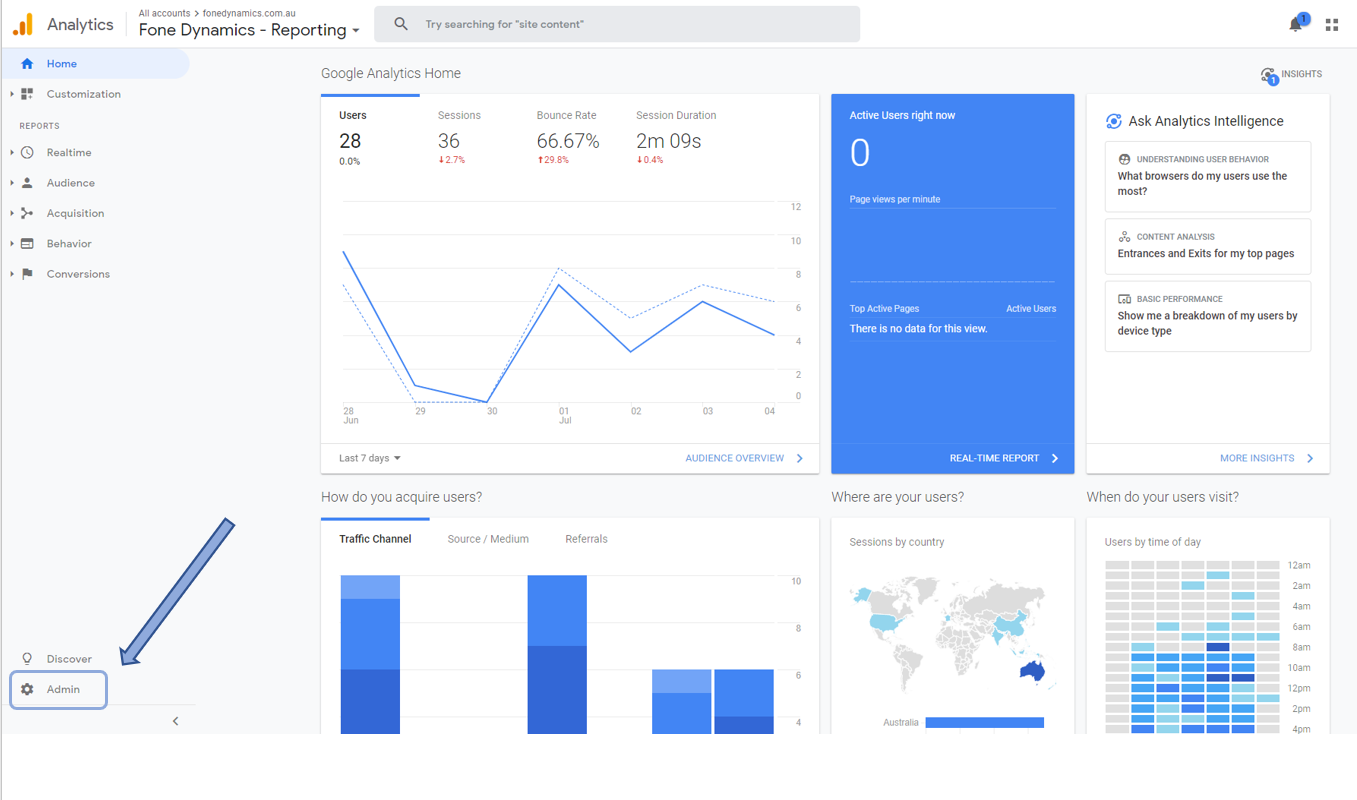
Step 2
Three columns will appear. In the far right column click on Goals.

Then click + New Goal button.

Step 3
There are many different types of goals you can set up. For call tracking you will need to select Custom and click Continue.

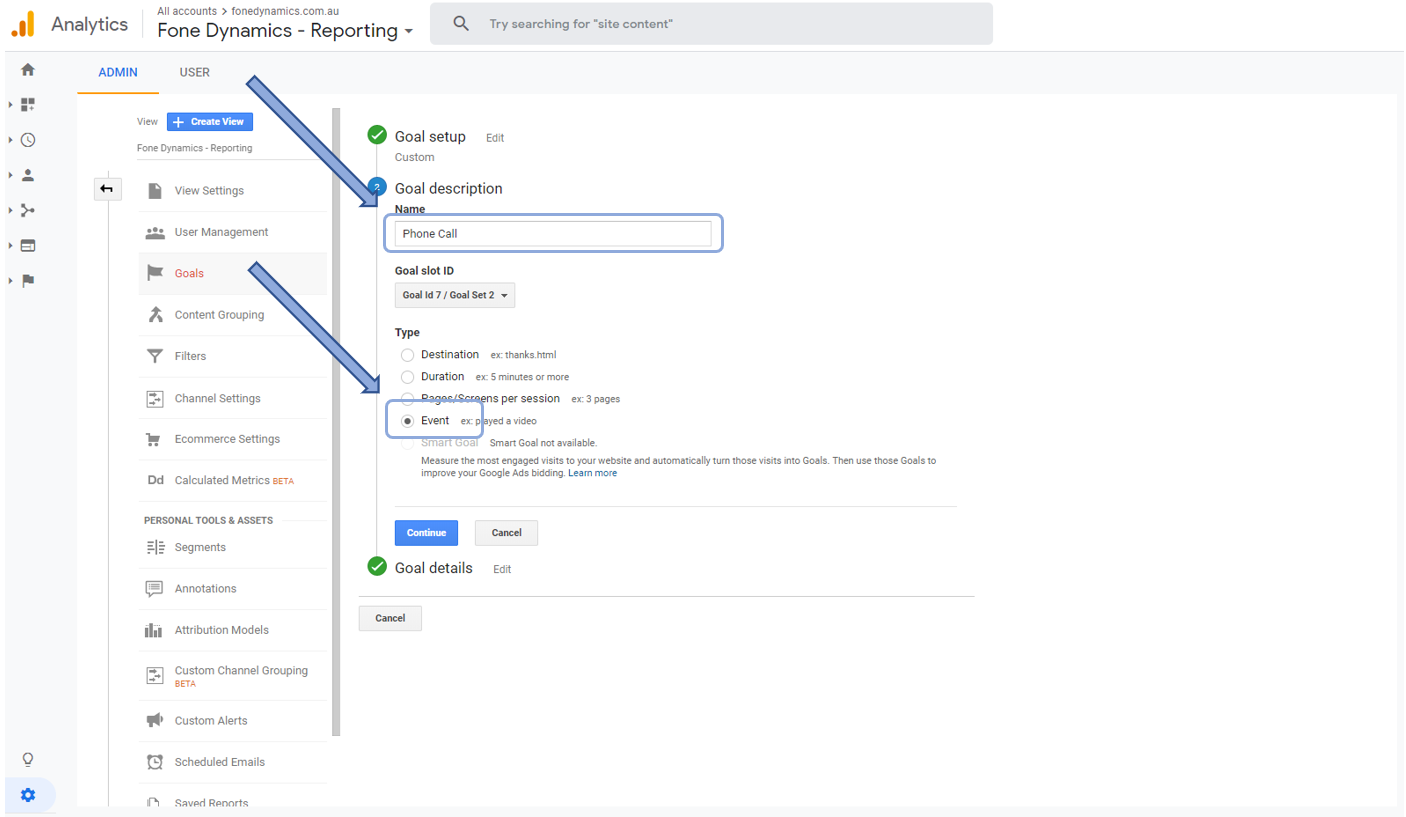
Step 4
Name your goal to match the integration settings, in our example we have named it 'Phone Call' and set the type to Event. Click Continue.
Step 5
Set the Category to match your integrations setting and change to be 'Equals to' in our example we have labelled ours 'Call Tracking' Save the goal and it will start recording data.

Step 6 (Optional - Custom Dimensions)
If you have specified custom dimensions in the setup you can implement these under 'Customer Definitions', these will then be available in analytics reporting:
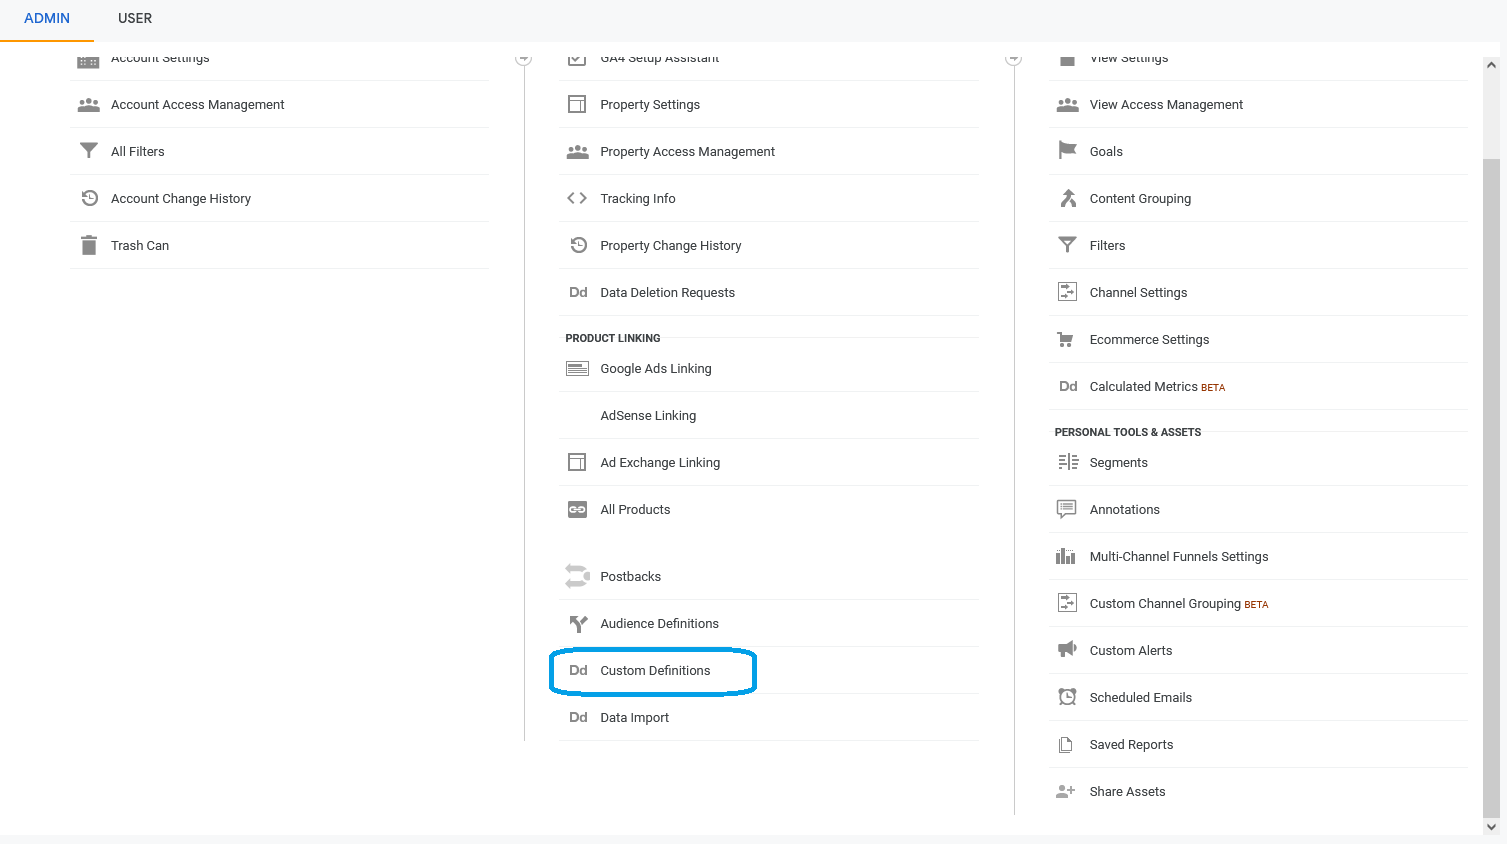
You can add as many or as few custom dimensions as you like, they can also be labelled however you like, provided you map the relevant index number in the table below to the dimension in the integration setup these will sync across.

How to Report Using Goals
Once you have set up your call tracking goal you will need to be able to view the corresponding data.
Step 1
Click on Conversions on the left hand side, then select, Goals, then select Overview.

Step 2
Select the date range you wish to report on via the date selector in the top right of the page.
Step 3
To view only data from your Phone Call Goal select the goal from the drop down menu under Goal Options.
You will now only be shown data relating to your phone calls. You will be shown the number of calls, what web page the customer was on when they called and how the customer got to your website (organic, AdWords etc.).